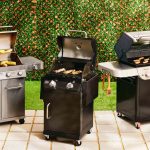
In this extensive guide on “How to Clean a BBQ Grill,” cooking on a BBQ grill is acknowledged as a delightful experience. However, over time, the residue from countless grilling sessions can accumulate and affect the flavor of your food. Whether you have a charcoal grill or a gas grill, keeping it clean is crucial to ensure it operates efficiently and that your meals consistently taste fantastic. We’ll explore the step-by-step process of cleaning various types of grills, including charcoal and gas grills, with a focus on cooking grates, grill brushes, and other essential tools and materials. Let’s dive into the world of BBQ grill maintenance.
Cleaning the Cooking Grates
One of the most crucial aspects of grill maintenance is cleaning the cooking grates thoroughly. Over time, these grates tend to accumulate an assortment of food residue, grease, and carbon deposits, all of which can significantly affect the flavor of your grilled dishes. To ensure optimal performance and taste, it’s essential to follow these comprehensive steps for cleaning your cooking grates effectively Ensuring the longevity and optimal performance of your grill requires meticulous attention to detail, particularly when it comes to maintaining the cooking grates. These essential components of your grill gradually amass various remnants including food residue, grease, and carbon deposits over time. Left unchecked, these buildups can profoundly influence the flavor and quality of your grilled creations. To uphold the integrity of your culinary endeavors, it is imperative to adhere to the following elaborate steps for cleaning your cooking grates with utmost thoroughness and precision:
Step 1: Heat the Grill
- Gas Grills: Turn on your gas grill and set it to high heat. Close the lid and allow it to heat up for about 15 minutes. The high heat will help loosen the food particles and grease stuck to the grates.
- Charcoal Grills: If you have a charcoal grill, light the charcoal and let it burn until it’s covered in white ash. Then, spread the coals out evenly and allow them to heat the grates.
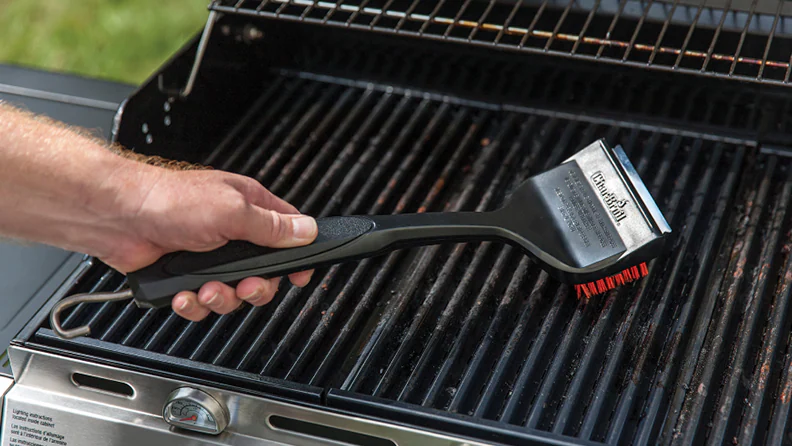
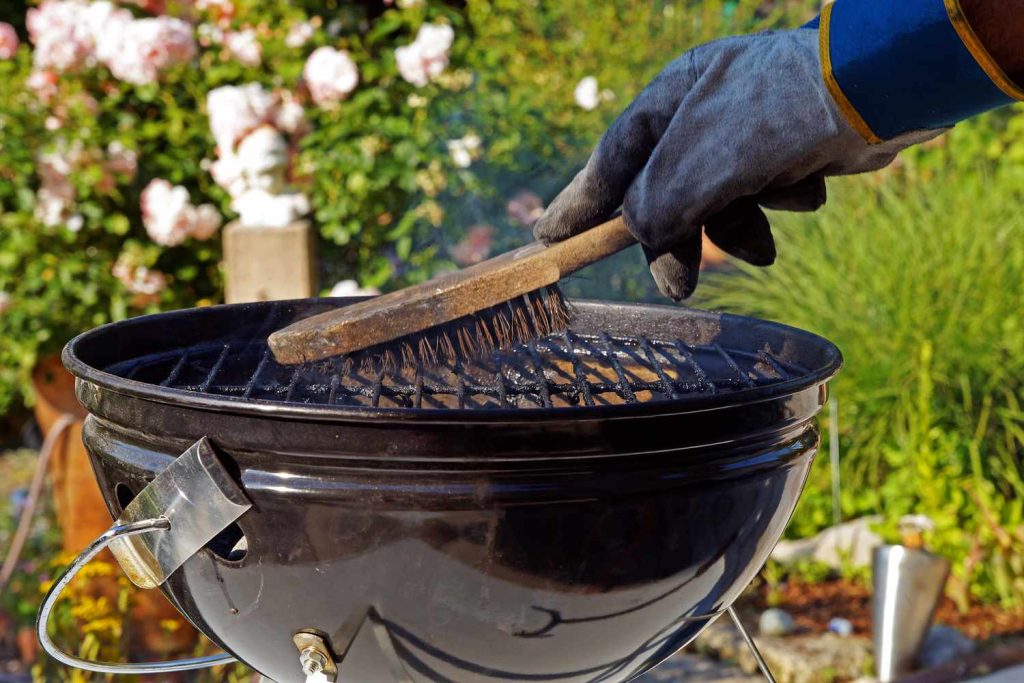
Step 2: Scrub with a Grill Brush
Once the grill grates are hot, use a grill brush with stiff wire bristles to scrub off any remaining residue. Brush in the direction of the grates’ bars, making sure to cover all areas. This will help remove the charred food and carbon buildup.
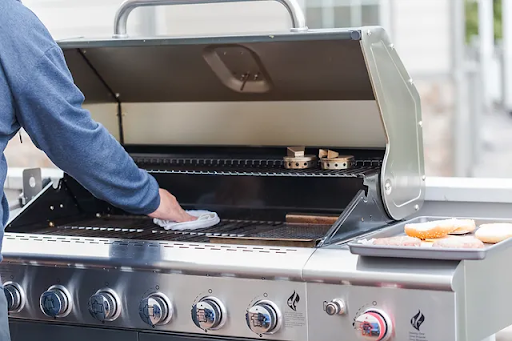
Step 3: Wipe Clean
After brushing, dip a paper towel or a microfiber cloth in warm soapy water and wipe down the grates. This will remove any remaining grease and debris. For particularly stubborn residue, you can use scouring pads.
Step 4: Oil the Grates
To prevent food from sticking to the grates during your next grilling session, lightly oil them with a paper towel soaked in vegetable oil. This also helps to create those attractive grill marks on your food.
Cleaning a Gas Grill
Gas grills are renowned for their convenience and precision when it comes to grilling, yet maintaining their longevity and optimal performance requires diligent cleaning. Neglecting this crucial aspect can lead to issues such as uneven heating, flare-ups, and even safety hazards. Therefore, it’s essential to establish a regular cleaning routine to keep your gas grill in top condition. Here’s a detailed step-by-step guide on how to effectively clean your gas grill and ensure it remains in peak operating condition for many grilling seasons to come:
Step 1: Disconnect the Gas Line
Safety first! Before cleaning your gas grill, disconnect the gas line from the propane tank or natural gas supply to avoid any accidents.
Step 2: Remove Grease Trays and Drip Pans
Gas grills have grease trays and drip pans that collect drippings and grease. Remove these and discard any residue. It’s essential to clean them regularly to prevent flare-ups and fires.
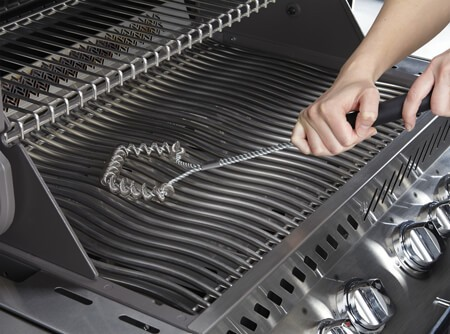
Step 3: Clean the Burners
Inspect the burners for any clogs or debris. Use a wire brush to clean them and ensure that the flame ports are clear. Clogged burners can result in uneven cooking.
Step 4: Wipe Down the Interior
Using warm soapy water and a cloth or sponge, clean the interior of the grill, including the walls and lid. Make sure to remove any built-up residue or grease.
Step 5: Check the Ignition System
Test the ignition system to ensure it’s working correctly. If it’s not, consult your grill’s manual for troubleshooting or consider professional maintenance.
Step 6: Reassemble and Test
Once you’ve cleaned all the components, reassemble your grill. Before cooking, heat it up to high for a few minutes to burn off any remaining cleaning residues.
Cleaning Charcoal Grills
Charcoal grills provide a unique smoky flavor to your dishes, but they require proper care to maintain that flavor and extend the grill’s lifespan. Here’s how to clean a charcoal grill: Start by ensuring safety, allowing the grill to cool completely before cleaning. Remove the grates and clear any ash buildup from the bottom. Use a grill brush to scrub the grates, employing warm water and mild dish soap for stubborn residue. Clean the interior walls with a brush or damp cloth, using a vinegar-water solution for tough spots. Rinse thoroughly to remove any cleaning solution residue. Regular cleaning will keep your charcoal grill in top condition for delicious outdoor cooking experiences.
Step 1: Dispose of Ashes
After each use, let the charcoal and ashes cool completely. Once cool, dispose of the ashes in a metal container. This prevents potential fire hazards.
Step 2: Remove the Grates
Take out the cooking grates and brush off any loose debris and ash. You can use a grill brush or a specialized ash tool for this.
Step 3: Clean the Inside
Using warm soapy water and a cloth, clean the inside of the grill, including the lid, walls, and base. Make sure to eliminate any built-up residue or grease.
Step 4: Reassemble and Prepare for Cooking
Once everything is clean, reassemble your charcoal grill, and you’re ready for your next grilling adventure.
Maintaining Your Grill Tools

In maintaining your grill, it’s not only the grill itself that requires attention but also the tools you use for grilling. Ensuring your grill brush, tongs, and other accessories are kept in prime condition is essential for optimal cooking experiences. Regular cleaning of these utensils is imperative to prevent the buildup of grease and residue, which can compromise the flavor and safety of your food. To keep your grill tools pristine, begin by thoroughly scrubbing them with warm, soapy water after each use. Pay close attention to crevices and hard-to-reach areas where debris may accumulate. Rinse them thoroughly and allow them to air dry completely before storing them away. Additionally, inspect your tools regularly for any signs of wear or damage, such as bent tongs or worn bristles on your brush. Replace any worn-out or damaged tools promptly to ensure safe and efficient grilling sessions. By dedicating time to care for your grill tools, you’ll not only prolong their lifespan but also enhance the quality of your outdoor cooking endeavors.”
Step 1: Soak in Warm Soapy Water
Fill a bucket or sink with warm soapy water and let your grill tools soak for a while. This will help loosen any food particles or grease.
Step 2: Scrub and Rinse
Use a brush or sponge to scrub the tools, removing any remaining residue. Rinse thoroughly with clean water.
Step 3: Dry and Store
After cleaning, ensure that your grill tools are completely dry before storing them. Moisture can lead to rust on metal tools.
Dealing with Stubborn Stains on Stainless Steel
First, start by gathering your supplies. You’ll need a soft cloth or sponge, warm water, dish soap, and if necessary, a stainless steel cleaner or polish. Begin by rinsing the stainless steel surface with warm water to remove any loose debris or dirt. Then, apply a small amount of dish soap to your cloth or sponge and gently scrub the surface in a circular motion. Be sure to rinse thoroughly with clean water afterward to remove any soap residue. If there are stubborn stains or grease buildup, you can use a stainless steel cleaner or polish according to the manufacturer’s instructions. Always remember to dry the stainless steel surface with a clean, dry cloth to prevent water spots or streaks. By following these steps regularly, you can keep your grill’s stainless steel components clean and looking their best for years to come.
Step 1: Use a Stainless Steel Cleaner
Apply a stainless steel cleaner to the surface and follow the product’s instructions. Typically, you’ll need to spray it on, wait a few minutes, and then wipe it off with a clean cloth.
Step 2: Buff the Stainless Steel
After applying the cleaner, use a dry microfiber cloth to buff the stainless steel to a shiny finish. This will remove streaks and smudges.
Dealing with Grill Grime: Baking Soda and Dish Soap
For particularly stubborn grime or grease buildup on your grill, you can use a mixture of baking soda and dish soap. Here’s how:
Step 1: Create a Paste
Mix baking soda and dish soap to create a thick paste. The exact measurements may vary, but a quarter-cup of baking soda and a few tablespoons of dish soap should work.
Step 2: Apply the Paste
Using a sponge or cloth, apply the paste to the areas with stubborn stains or grime. Allow it to sit for 10-15 minutes.
Step 3: Scrub and Rinse
Scrub the affected areas with a sponge or scrub brush. Rinse with warm water to remove the paste and any loosened grime.
Wrapping Up
With grilling season upon us, knowing how to clean a BBQ grill is a fundamental skill for all grill masters. Regular cleaning not only ensures that your food tastes its best but also extends the lifespan of your grill. Remember to clean the cooking grates, the inside of the grill, and any stainless steel components. For gas grills, pay attention to the burners and ignition system, while charcoal grills require ash disposal. Keep your grill tools clean, and you’ll be well-prepared for a summer full of delicious BBQ dishes. Happy grilling!