Chances are you’re currently standing over your dirty gas grill not knowing where to start and what to do. One thing for certain, by the end of this article and these steps you’re going to have a freshly cleaned grill. Cleaning a gas grill is a lot like cleaning a car, it only takes a couple of tools, a good hour, and a lot of elbow grease. So without further ado, let’s get cleaning on that backyard grill, so you can do what you do best, cooking delicious meals: So Here the ways for How to clean your gas grill:
Maintaining your grill
When it comes to maintaining your grill you don’t need to know where every bolt goes or every part that goes into it. Maintaining your barbecue is simple and can be very effective in extending the life of your BBQ grill if you simply follow these tips:
Checking for Gas Leaks
Once a month mix a half cup of water with a half cup of dish wash soap and with a paintbrush apply to all connection points in your gas line (have the gas running when doing this). Pay close attention to the gas lines and be sure they don’t bubble, if they do bubble that means you have a leak. To fix a leak either tighten the line or take the hose to your nearest hardware store and replace it. Gas line hoses are mainly constructed of rubber, once the rubber has been outside for an extended period of time it’ll crack and dry out, thus weakening its structure. It should be noted to replace your gas line hose every 4-5 years.
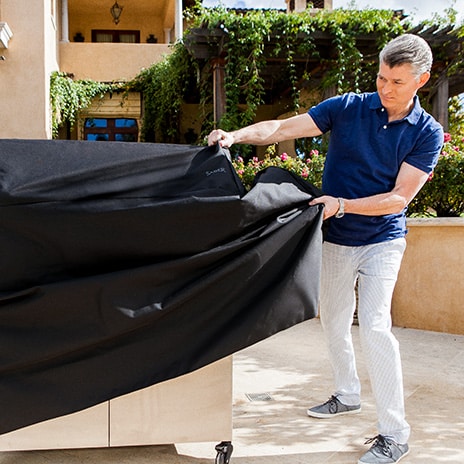
Protect and Cover your Grill
Purchasing a grill cover as an upgrade for your barbecue may be the smartest thing you do. Owning a grill cover is smart in two ways: it protects the grill from Mother Nature and it extends the life of your gas grill. Most grill covers are constructed of heavy-duty canvas or vinyl and feature a soft felt lining on the inside so they don’t scratch the stainless steel.
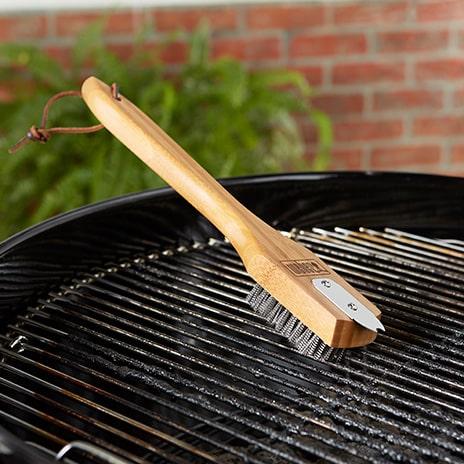
Clean your gas grill regularly
Before we go into detail about how to clean your gas grill! below (which should be done every three months depending on the amount that you grill)!, you should also spot clean it after every use. Spot cleaning the grill includes brushing the grates with a grill brush! after every cooking session and wiping down the exterior with some stainless steel polish and cleaner. Another good idea is after you’re done cooking, turn all grill burners! on high for 15 minutes before fully shutting off the unit. Doing this ensures that any small grime or grease doesn’t! build up as fast, which can happen faster than you think.
Cleaning your grill
If you’re looking to extend the life of your grill and get the same back-to-back performance! every time you use it then the only way you’re going to be able! to do that is by thoroughly cleaning your gas grill once every three months. Following the steps below will ensure that your barbecue will be running strong for years to come.
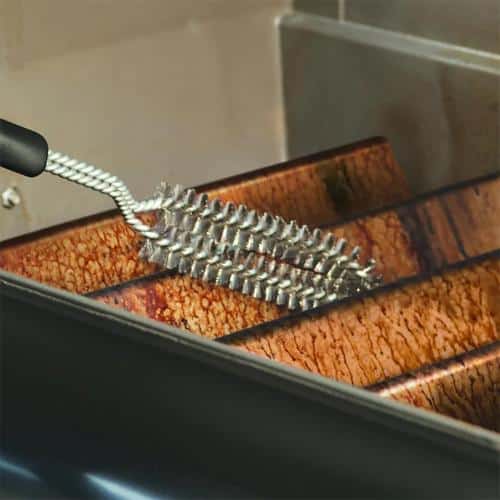
Cleaning the cooking grates
After cooking, turn control knobs to the “OFF” position! and let the grill cool down before attempting to clean the cooking grates. Once the grill has cooled down take a grill brush preferably a brass bristle brush! and aggressively brush off the top portion! of the grill grates. If your grill brush includes a stainless steel scraper on that back use that to eliminate the burnt on pieces of food.
Don’t forget the under-grate
Once you’ve brushed the tops of your cooking grates go ahead! and take them out of the grill, you’ll notice that the opposite! side of the cooking grate may also have so grease or burn food pieces, go ahead and brush that side off as well. When done set the cooking grates aside.
Disclaimer: Recently it’s been practiced that cleaning your cooking grates with aluminum foil is another alternative to a grill brush. While it may be effective what may not be understood is that the metal from the aluminum gets embedded into the metal! of the cooking grate, after heating and cooling this may cause rusting. Cooking on a rusted surface may be hazardous to your health.
Cleaning the burner covers or ceramic briquettes
Burner protectors such as flame tamers and ceramic! briquettes are meant to do one thing in particular!, protect the burner from grease and food, so don’t be surprised! when you notice that these items are the dirtiest. If your grill has flame tamers that either burner width or cooking! grate width, simply grab a grill brush and knock down! as much grime and grease as you can on both sides.
When done put them aside. If your grill includes ceramic briquettes that are encased inside! of a tray then there’s an easy way to clean the system. Simply flip the briquette tray over so the top of the briquettes! is above the grill burner, turn the grill on high and leave it there! for 15 minutes, 15 minutes later turn off the grill and allow the grill to cool. Once the grill is cool go ahead and take out the ceramic briquettes and they should be completely clean.
Disclaimer: If your grill features ceramic briquettes DO NOT attempt to clean the briquettes with water. Once you get the ceramic wet and the grill is turned on your briquettes will crack and fall apart.
Cleaning and checking the grill burners
Remove burners from the grill by carefully lifting each burner up and away from the gas valve orifice, each burner may have a hairpin underneath the backside. Wire brush the entire outer surface of the burner to remove food residue and dirt, and clean any clogged ports with a stiff wire such as an open paper clip. Inspect the burner for damage (cracks or holes) and if such damage is found, order and install a new burner. After installation, check to ensure that the gas valves are correctly placed inside the ends of burner tubes, also check the position of the ignition system. Don’t install the burners just yet, wait until the grill cleaning process is over.
Getting rid of the last gunk
After removing the barbecue burners from your grill you’ll basically left with an empty grill! cavity with a plate at the very bottom of the unit, this plate is known as the drip tray. The drip tray is basically the last resort for catching all grease, food drippings, and charred food. Finish up the grill cleaning by pushing all of the leftover grease and burnt food down into the grease! tray, once that is done pull out the grease tray! from the front or back of the grill and dump it into a black trash bag.
Soap and Scrub
After dumping the grease tray you should have your cooking grates!, burner covers, grease tray, and any other components! your grill has all set aside. Get a large bucket of warm water and dish soap and mix them together. With an abrasive sponge clean all pieces and rinse thoroughly with water. Once all pieces are cleaned rinse thoroughly with clean water and sit out to dry for 45 minutes.
Reassemble your grill and get to cooking
Once all of your parts are cleaned and dried out go ahead! and put them back into your grill ensuring that everything fits right. Turn the gas back on and test the ignition system to make sure the grill fires up. Enjoy the cooking on a freshly cleaned grill. n
So These were Some Notes About How to clean your gas grill?
And Now Let’s Have a Look into Best Built-In Gas Grills of 2022