")
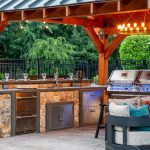
Are you ready to embark on the exciting journey of building your very own outdoor kitchen? The mere thought of hosting amazing parties, preparing delicious cookouts, and igniting the flames of excitement is enough to get anyone’s heart racing. However, we understand that this endeavor can be both exhilarating and daunting, often pushing the boundaries of your sanity. Let’s Dive in and check How to Build an Outdoor Kitchen: 7 Simple Steps
We are driven by a passion to equip you with all the essential tools and knowledge necessary to become a true barbecue boss right from the start. Have you taken a look at our comprehensive Outdoor Kitchen Checklist? It’s a valuable resource that will undoubtedly prove invaluable throughout your journey (and if you haven’t, you definitely should)!
Whether you’re seeking to proactively avoid potential headaches or find yourself already frustrated, shaking your fist at the sky and cursing the very concept of outdoor kitchens, we’ve got your back every step of the way. To ensure your success, we’ve consulted our seasoned outdoor living experts, who have shared their top eight fundamental principles to keep in mind when planning your outdoor kitchen. With their guidance, you’ll be well-prepared for the task ahead and set yourself up for a truly remarkable outdoor culinary experience.
1. Constructing your outdoor kitchen using flammable materials? Consider adding an Insulated Grill Jacket for added safety and protection.
When building an outdoor kitchen with combustible materials, it is essential to install an insulated grill jacket around your grill. This protective metal sheath serves a crucial purpose in safeguarding both your grill and your investment.
First and foremost, the insulated grill jacket offers unparalleled defense to the undercarriage of your grill. By shielding it from the effects of weathering and corrosion, it helps to prolong the lifespan of your grill, ensuring it remains in optimal condition for years to come.
Additionally, the jacket acts as a barrier against the intense heat generated by your grill, preventing any potential damage such as burning or warping to the surrounding BBQ island. This protection is particularly vital when dealing with piping-hot temperatures, ensuring that your outdoor kitchen remains intact and visually appealing.
It’s important to note that not all grill brands offer proprietary insulated grill jackets, so it’s essential to research and find one that fits your specific grill model. For more in-depth information on selecting the right insulated grill jacket for your outdoor kitchen, we recommend consulting our comprehensive Insulated Grill Jacket Buying Guide. It will provide you with valuable insights and help you make an informed decision to ensure the safety and longevity of your outdoor cooking space.
2. Ensure Proper Ventilation for Your Outdoor Kitchen Investment with Vent Panels
Opting for a gas-powered outdoor kitchen? That’s fantastic! However, it is crucial to prioritize safety by enlisting the services of a licensed contractor to ensure your outdoor kitchen has appropriate grill vents and proper ventilation. While it might be tempting to cut corners and save some money by seeking noncertified plumbers through unofficial channels, the potential dangers far outweigh any cost savings. Trust us, avoiding avoidable gas leaks and build-ups is of utmost importance, as they can lead to hazardous situations and potential explosions.
When it comes to venting, the placement of vent panels plays a critical role. To effectively minimize gas build-up, it is recommended to install vent panels at regular intervals of approximately 4-6 feet throughout your outdoor kitchen space. For installations utilizing natural gas, it is advisable to position the vent panels as high as possible since natural gas tends to rise. On the other hand, for propane gas, which tends to sink, the vent panels should be placed at lower levels.
By ensuring proper ventilation with strategically positioned vent panels, you create a safer environment within your outdoor kitchen. This step significantly reduces the risk of gas-related incidents, providing you with peace of mind while enjoying your outdoor cooking experience. Remember, always prioritize the expertise of licensed professionals and consult with them to determine the ideal venting solution for your specific outdoor kitchen setup.
3. Consider Practicality When Choosing Enclosed Storage for Your Outdoor Kitchen
Storage is a crucial aspect of any outdoor kitchen. After all, we all need a place for our belongings, and logically speaking, we want those places to be readily available (cue the “transitive property of equality” for our math-savvy grill enthusiasts out there). While the allure of cabinets, doors, and drawers may be enticing, it is essential to carefully consider the placement of your outdoor kitchen cabinets and storage options before investing in enclosed cabinets.
One common mistake made by enthusiastic outdoor kitchen owners is purchasing enclosed cabinets without taking into account the practicalities of their intended placement. For example, installing cabinets beneath a sink or under a gas grill can pose significant challenges due to the presence of plumbing and potential obstructions. Discovering that pesky plumbing stands in the way of your enclosed cabinets can quickly turn into a headache you’d rather avoid.
To prevent such complications, it is crucial to thoroughly assess the space and layout of your outdoor kitchen. Take into consideration the location of plumbing lines, gas connections, and other potential obstacles before finalizing your storage choices. By doing so, you can ensure a seamless and efficient installation process, avoiding unnecessary frustrations and maximizing the functionality of your outdoor kitchen.
When selecting storage components, consider alternative options such as open shelves or modular units that can be customized to fit around any existing plumbing or obstacles. This approach allows for greater flexibility in adapting your storage solutions to the specific layout of your outdoor kitchen.
Remember, a well-thought-out storage plan that accounts for practicality will save you time, effort, and headaches in the long run, ensuring a smooth and enjoyable outdoor cooking experience without any unnecessary obstacles.
4. Opt for Outdoor-Rated Kitchen Appliances for Optimal Performance
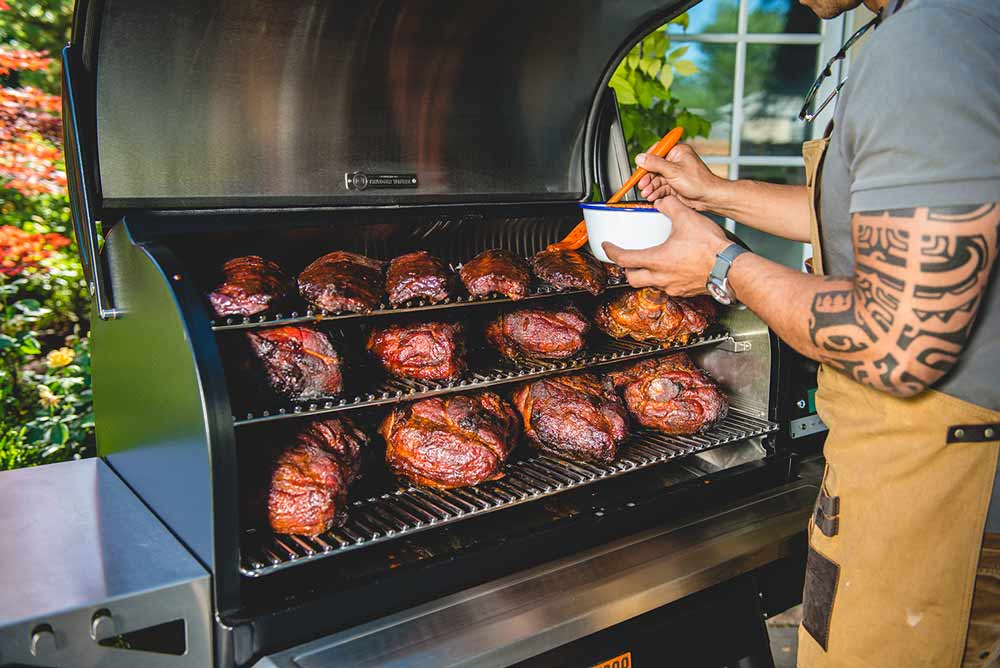
When it comes to outfitting your outdoor kitchen, it’s essential to choose appliances that are specifically design for outdoor use. Attempting to repurpose indoor appliances for outdoor environments can lead to a host of problems, including discoloration, premature failure, and the disappointment of voiding your warranty.
Outdoor-rated appliances, on the other hand, are purpose-built to withstand the challenges posed by harsh climates, sudden temperature fluctuations, and exposure to the elements. They are constructed with durable materials and feature enhanced weather resistance, ensuring their longevity and reliable performance in outdoor settings. It’s a significant step up from that spare beverage cooler sitting in your uncle’s den.
When purchasing outdoor refrigeration or any other appliance, it is crucial to learn how to identify models that are specifically rated by the manufacturer for outdoor use. How to Build an Outdoor Kitchen: 7 simple Steps This certification ensures that the appliance is design to meet the unique demands of outdoor environments, providing you with higher levels of safety and longevity.
For added assurance, consider opting for appliances with a UL rating. Underwriters Laboratories, establish in 1894, is a widely trust safety certification company with a global presence in 46 countries. Choosing appliances with a UL rating means they have undergone rigorous testing and meet stringent safety standards, giving you peace of mind regarding their performance and reliability.
By investing in outdoor-rated appliances and looking for additional certifications like UL ratings, you’re making a smart choice that prioritizes both appliance durability and the safety of your outdoor kitchen. This way, you can fully enjoy your outdoor culinary adventures without worrying about the performance or premature failure of your appliances.
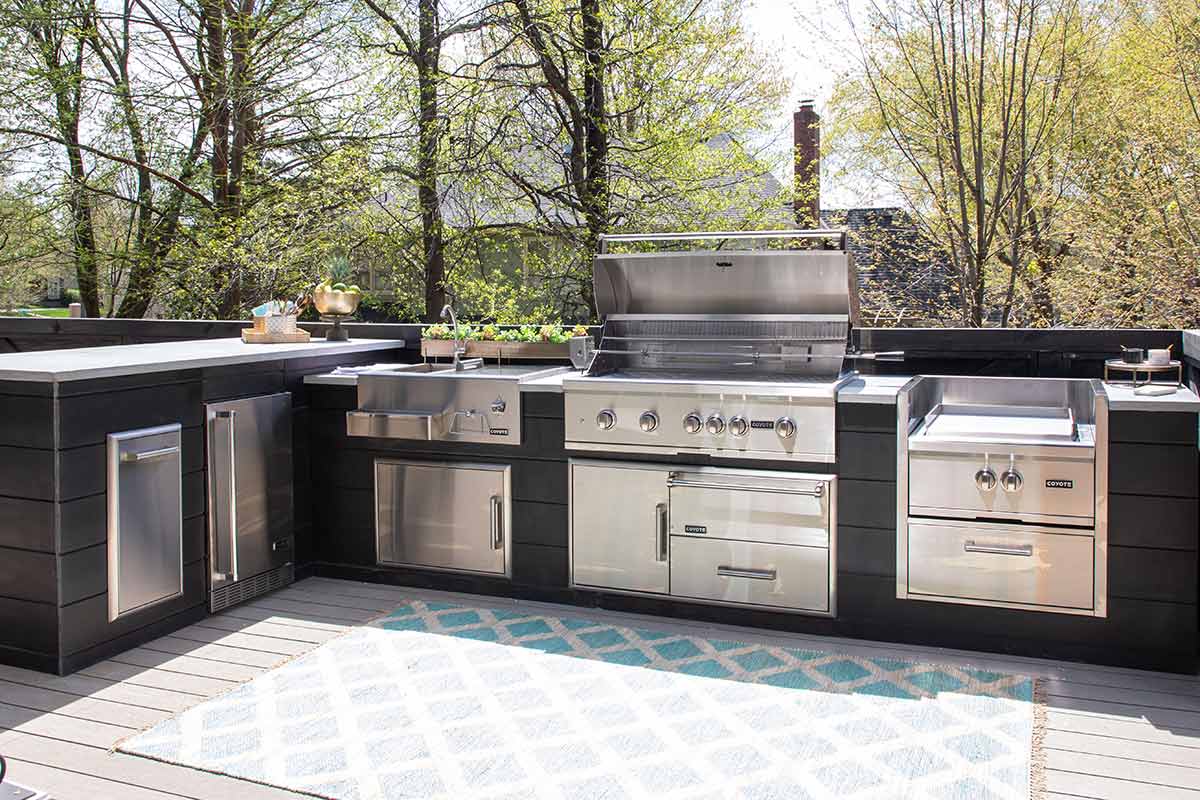
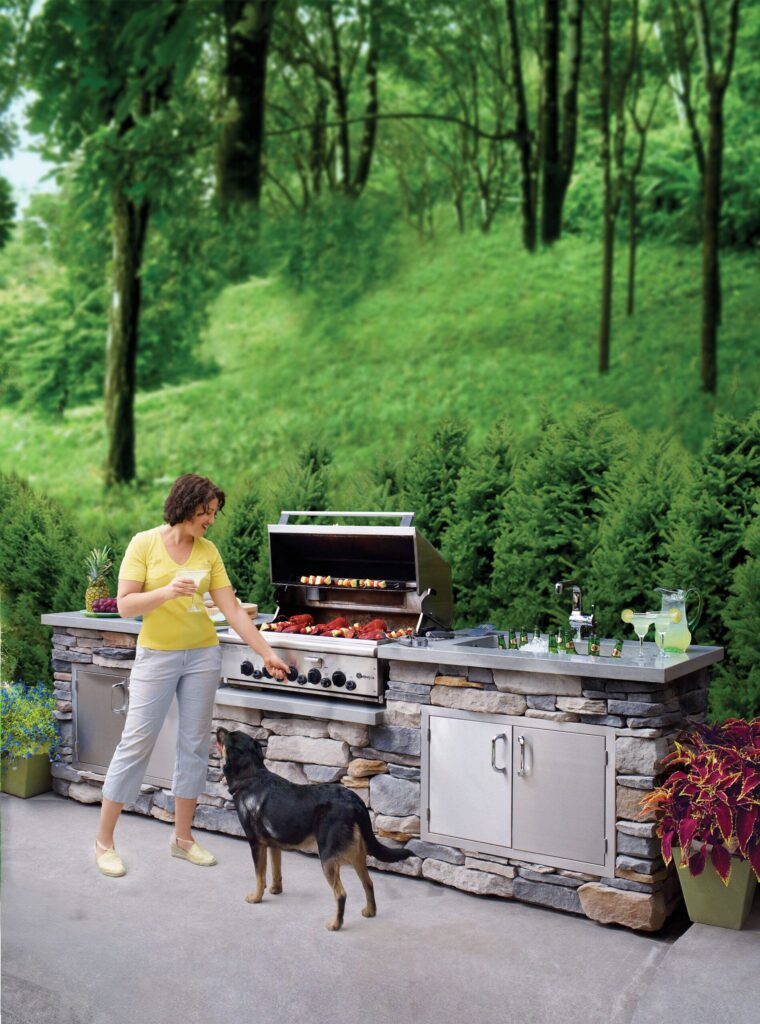
5. Create Proper Zones: Keep Cooking and Cooling Appliances Separate
Here’s an important tip to keep in mind when designing your outdoor kitchen: it’s crucial to plan your layout in a way that separates your cooking and cooling appliances. Believe it or not, refrigerators and grills used to challenge the laws of physics during their childhood days, and physics never forgets!
Both cooking and cooling appliances generate a significant amount of heat during operation. If these appliances are install right next to each other, their proximity can lead to difficulties in keeping their internal mechanisms cool, potentially resulting in premature failure. To prevent such issues, it is advisable to create distinct zones within your outdoor kitchen.
If space is a constraint, ensure that there is at least a one-foot gap between your refrigeration unit and any nearby grills or side burners. This spacing allows for proper airflow and ventilation, preventing heat build-up and ensuring that each appliance can function optimally. By maintaining this separation within the structure of your outdoor kitchen island, you promote the longevity and efficient operation of your appliances. How to Build an Outdoor Kitchen: 7 simple Steps
Keeping your cooking and cooling appliances in separate zones helps to keep them happy and ensures that they can effectively ventilate. This simple yet important step will significantly contribute to their longevity and reliability, allowing you to enjoy the full benefits of your outdoor kitchen for years to come.
6. Precision Matters: Master the Cutout Dimensions Before Making Any Cuts
In the words of renowned home improvement guru Bob Villa, “Measure twice, cut once.” We couldn’t agree more! When it comes to preparing the space for your outdoor kitchen appliances, the last thing you want is to realize later that your cutouts are off the mark. So, take the time to double-check, and even triple-check, those dimensions. It’s always better to be safe than sorry!
Whenever possible, it’s highly recommend to have the actual appliances on hand while measuring the cutout dimensions. This hands-on approach allows for precise measurements and ensures a perfect fit. However, if it’s not practical to have the appliances available during the planning stage, don’t worry. How to Build an Outdoor Kitchen: 7 simple Steps You can still obtain accurate cutout dimensions by reaching out to the manufacturer or a knowledgeable sales representative.
If you have any doubts or questions regarding the proper cutout dimensions, don’t hesitate to contact the manufacturer directly. Their expertise will guide you in making the right decisions to ensure a seamless fit for your outdoor kitchen appliances.
Remember, precision is key when it comes to creating the ideal space for your outdoor kitchen appliances. By mastering the cutout dimensions and taking the necessary precautions, you’ll ensure a proper fit and avoid any costly mistakes or delays in your outdoor kitchen project.
7. Embrace the Value of Ample Counter Space in Your Outdoor Kitchen
When envisioning your dream outdoor kitchen, it’s easy to get catch up in the excitement of filling it with a multitude of enticing gadgets and tools, each promising endless grilling possibilities. However, it’s important to hit the brakes and consider the significance of having sufficient counter space. Trust us, you won’t hear anyone exclaiming, “Oh no, I have too much counter space!”—ever!
Empty counter space plays a crucial role in the functionality of your outdoor kitchen. It provides the necessary area for food preparation, serving meals, and even accommodating overflow trays for your delicious grilled creations. Furthermore, it ensures that your favorite utensils and cooking essentials are within arm’s reach, adding convenience and efficiency to your outdoor cooking experience.
As you plan your patio paradise, make it a priority to allocate ample counter space for seamless and enjoyable outdoor cooking. Remember, How to Build an Outdoor Kitchen: 7 simple Steps having enough room to work and organize your ingredients and cooking tools will significantly enhance your overall culinary endeavors.
So, when designing your outdoor kitchen layout, strike a balance between incorporating exciting new toys and leaving generous counter space. Consider the flow of your cooking process, allowing for easy movement and accessibility to all the essentials. By doing so, you’ll set the stage for a well-equipped and thoughtfully designed outdoor kitchen that Future You will undoubtedly appreciate and toast to your wisdom.
Embrace the concept of abundant counter space, and let it be a testament to your foresight in creating a functional and inviting outdoor cooking environment. Cheers to your outdoor kitchen masterpiece!